Time Center Navigation
Time Center Overview
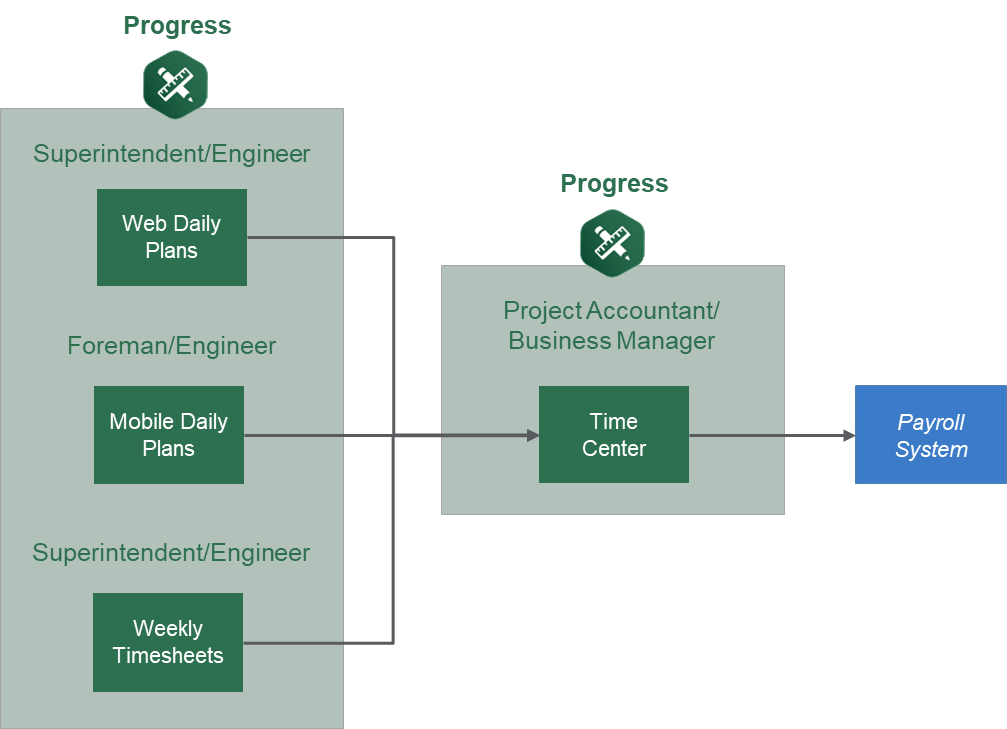
Time Center serves as a final repository to review and correct timesheet information before importing into your payroll system. Time Center allows you to review entries, called time cards, brought in from:
-
Daily plans approved within the Progress Daily Planning (Web and Mobile) application
-
Progress Weekly Timesheet module
Time Center Purpose
The purpose of Time Center is to:
-
Review the daily plans (time cards) received from Plan and Progress
-
Ensure time cards have the correct properties and data elements
-
Edit and correct any potential errors
-
Send the reviewed and corrected time cards to your payroll system to process for payment
-
Eliminate the need to edit time cards via payroll system database tables or side spreadsheets exported from Excel
Display Configurations
The Time center UI is designed for full HD resolution 1920 x 1080 with browser zoom of 100% and Windows display scaling of 100%. Display configurations other than what is recommended might not render correctly.
Each InEight application has its own supported display configurations, which might be different than the configuration above.
Time Center Access
To access projects in Timecenter the project setting Use Employee Reason Codes must be toggled on. This setting is required prior to creating daily plans and cannot be changed once daily plans are created.
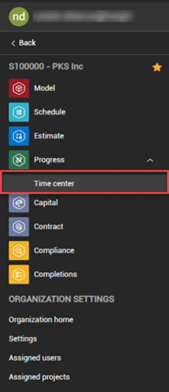
The Progress time center will show as a sub-level menu option under the account level.
You need to have organization or account access to see the sub-level option for Time center.
This option requires level 2 or 3 administrator levels. To set the correct administrator level, Go to Suite administration > Roles and permissions, and then click the Add role icon.
Under Role details, the Administrator level field includes a drop-down menu.
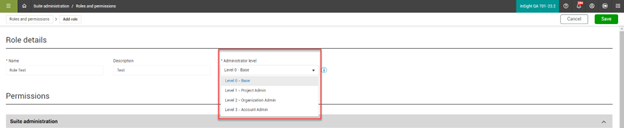
The administrator level can be set and saved only once for every new role.
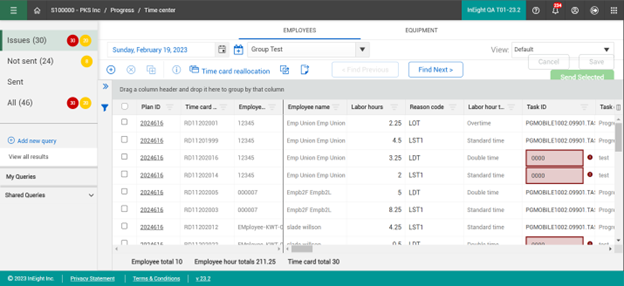
|
Title |
Description |
|
|---|---|---|
|
1 |
Employee / Equipment Tabs |
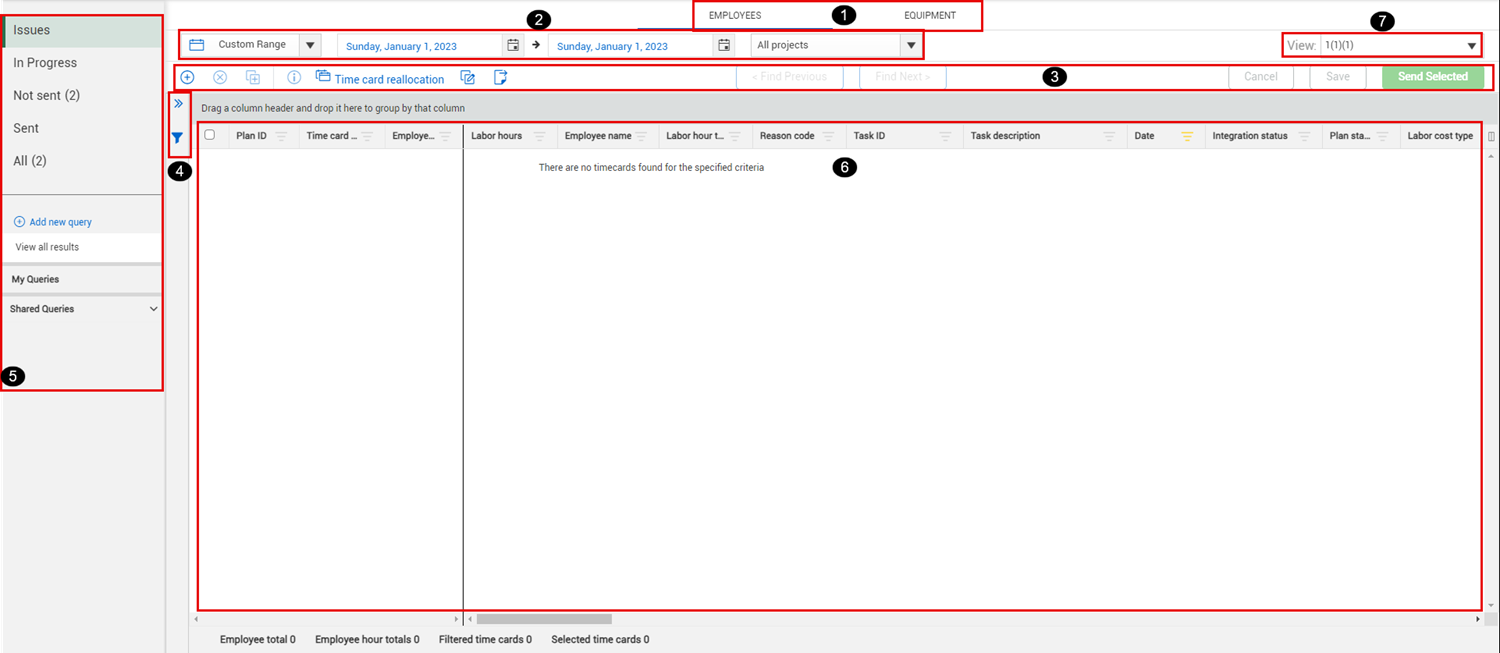
Select the appropriate tab to view the time cards for either employees or equipment. |
|
2 |
Date Filter |
Select the date to filter using a custom date range or from a predefined calendar. |
|
3 |
Toolbar |
Add, edit, delete or copy time cards using the toolbar on the left. View summary information, make bulk edits, and export time cards using the toolbar on the right. |
|
4 |
Query Shortcut Icons |
The double arrow is a shortcut to expand the Query builder slide out panel. The blue filter icon indicates how many queries are applied. Yellow filter icons appear for each filter applied. |
|
5 |
Side Panel |
The upper portion has preset filters to view just time-cards with issues, time cards in progress, time cards not sent, time cards sent, or all time cards. The lower portion contains the Query builder to create queries to search for specific time cards. You can save your queries under My queries, and access Shared queries. |
|
6 |
Time card register |
Contains rows and columns that house all time card data imported from daily plans and weekly timesheets. |
| 7 | View | Views can be saved, removed, and shared with users and roles. Permissions are required for Time Center access. |
Time Center Register Columns
The Time Center register contains all the information captured using the Progress application for your daily plans in the field, as well as weekly timesheets from the Weekly timesheets module. The register columns fixed to the left are pertinent for identifying the time cards and include the Plan ID, Time card ID, Employee ID, Employee name and Labor/Equipment hours columns. The columns on the right contain additional data brought in from InEight Progress for you to review for issues.
The following table lists the columns available in the Time center register. You will edit these fields as needed to make corrections to your time cards. Fields not editable in Time Center can be edited in either InEight Progress or in your Payroll application, depending on the field.
|
Column |
Editable in Time Center? |
Sortable? | Filterable? |
|---|---|---|---|
|
Plan Level Fields |
|||
| Plan ID | No | Yes | Yes |
|
Plan Status |
No |
Yes | Yes |
|
Daily Plan name |
No |
Yes | Yes |
|
Date |
No |
Yes | No |
|
Approver 1 ID |
Automatic |
Yes | Yes |
|
Approver 1 name |
Yes |
Yes | Yes |
|
Approver 1 Role |
Yes-Conditional |
No | Yes |
|
Approver 2 ID |
Automatic |
Yes | Yes |
|
Approver 2 name |
Yes |
Yes | Yes |
|
Approver 2 Role |
Yes-Conditional |
No | Yes |
| Labor hour type | No | Yes | Yes |
|
Client approver name |
No |
Yes | Yes |
|
Executor name |
Yes |
Yes | Yes |
|
Executor ID |
Automatic |
Yes | Yes |
|
Executor Role |
Yes |
No | Yes |
|
Shift |
Yes |
Yes | Yes |
|
Employee Fields |
|||
|
Employee ID |
Yes-Conditional |
Yes | Yes |
|
Employee Name |
No |
No | Yes |
|
Labor Hours |
Yes |
Yes | Yes |
|
Reason Code |
Yes |
Yes | Yes |
|
Reason Description |
Automatic |
Yes | Yes |
|
Trade ID |
No |
No | Yes |
|
Trade description |
No |
No | Yes |
|
Employee Fields (Continued) |
|||
|
Craft ID |
No |
No | Yes |
|
Craft description |
No |
No | Yes |
|
Override trade |
Automatic |
No | Yes |
|
Override trade description |
Automatic |
No | Yes |
|
Override craft |
Yes |
No | Yes |
|
Override craft description |
Automatic |
No | Yes |
|
Union code |
No |
No | Yes |
|
Employee billing class |
Yes |
No | Yes |
|
Uplift |
No |
No | Yes |
|
Uplift override |
Yes |
Yes | Yes |
|
Employer company |
No |
No | Yes |
|
Premium 1-6 |
Yes |
Yes | Yes |
|
Timesheet Entry Fields |
|||
|
Time card ID |
No |
Yes | Yes |
|
Task ID |
Yes |
Yes | Yes |
|
Task description |
Automatic |
Yes | Yes |
|
Budget Code - Segment 1 (e.g., Cost Center) |
Automatic |
Yes | Yes |
|
Budget Code - Segment 2 |
Automatic |
Yes | Yes |
|
Budget Code - Segment 3 |
Automatic |
Yes | Yes |
|
Budget Code - Segment 4 |
Automatic |
Yes | Yes |
|
Time card Type |
No |
Yes | Yes |
|
Labor Cost type |
Yes |
No | No |
|
Equipment cost type |
Yes |
No | No |
|
Notes |
Yes |
Yes | No |
| Version number | No | No | No |
|
Equipment Fields |
|||
|
Equipment ID |
Yes |
Yes | Yes |
|
Equipment description |
Automatic |
No | Yes |
|
Equipment hours |
Yes |
Yes | Yes |
|
Equipment reason code |
Yes |
Yes | Yes |
|
Equipment reason code description |
No |
Yes | Yes |
|
Equipment location |
No |
No | Yes |
|
Maintenance Fields |
|||
|
Work order |
Yes |
Yes | Yes |
|
Work order description |
Automatic |
Yes | Yes |
|
Equipment repair number |
Yes |
No | Yes |
|
Equipment repair description |
Automatic |
No | Yes |
|
Status Fields |
|||
|
Modified by |
Automatic |
Yes | Yes |
|
Modified date |
Automatic |
Yes | Yes |
|
Integration status |
Automatic |
Yes | Yes |
|
Validation issue? |
Automatic |
Yes | Yes |
| Employee shift start | Yes | Yes | Yes |
| Employee shift end | Yes | Yes | Yes |
| Plan shift start | Yes | Yes | Yes |
| Plan shift end | Yes | Yes | Yes |
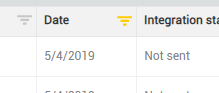
The Integration status indicates whether the time cards have been sent to the payroll system.
Sort Columns
You can sort in ascending or descending (both for alpha and numeric fields) on any column’s header. Click once to sort the column in ascending order (A-Z, 1-10). A yellow arrow displays on the column header pointing upward.
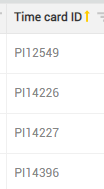
Click a second time on the column header to sort in descending order (Z-A, 10-1), and the arrow will point downward. Click a third time to reset the column to its default state.
Move Columns
You can move columns using drag and drop to rearrange them as needed and the system will remember the column order the next time you log in.
Filter columns
Depending on the project, you may have thousands of time cards to sift through. You can filter your time cards using column filters to drill down by date, employee, or whatever other criteria you need.
To filter on a column, select the filter icon on the column’s header, then hover over the Filter menu option.
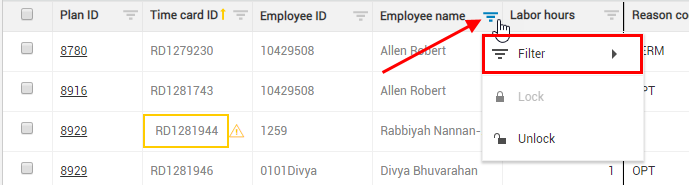
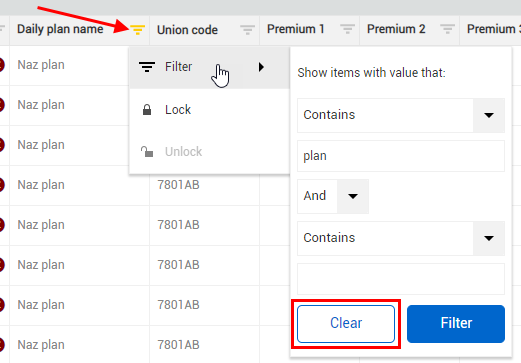
On the resulting Filter window, you can select an operator and value to filter by.

The register now filters your time cards by the filter value you selected, and the filter icon on the column header is yellow to indicate the column is being filtered.
To clear the filter, you would click on the columns filter icon and select Clear.
Group Columns
With column grouping, you can organize your time cards into groups by the values of a selected column. By organizing time cards into groups, you can review time cards more efficiently. Grouping columns lets you group information most applicable to your process, and you can group by any column without affecting any of the time card data.
To group by a column, click on the column’s header and drag it into the grey area just above the column headers.

Your time cards are now organized into groups based on the values within the column. Each group is collapsible and subtotals the labor or equipment hours of the time cards within each group.
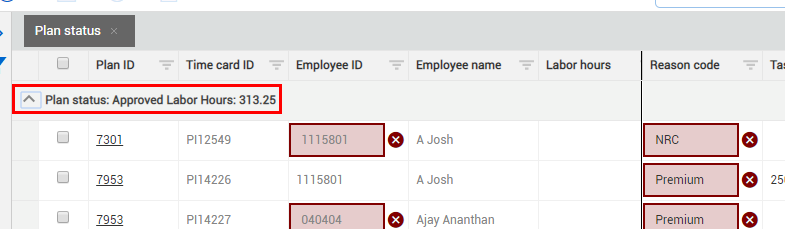
To remove a grouping, click the x on the grouped column header within the grouping area.
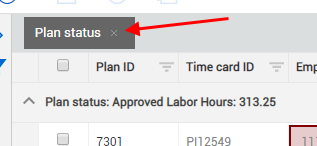
The column will return to its placement within the register.
Project groups
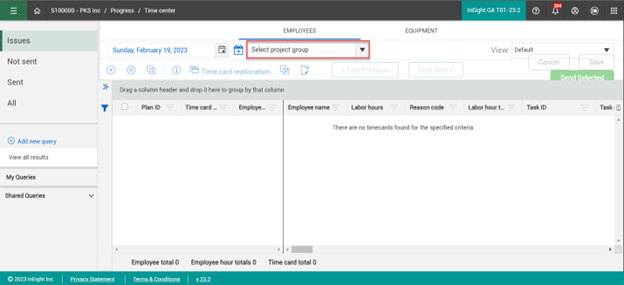
You can view one or more projects at a time in a single grid of data with the project groups option.
Go to Progress Time center, and then click on the drop-down menu labeled Select project group. You can select previously saved groups, and edit or add a new project group.
To add a new group, name the new project group, and then select from the available projects or organizations.
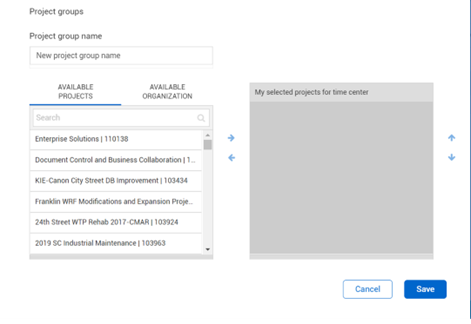
If your resources go across projects, this helps to check employees assigned to multiple projects on a single page instead of checking each project individually.
You can still work with a single project. The option to create groups has been added as a quicker work flow option.
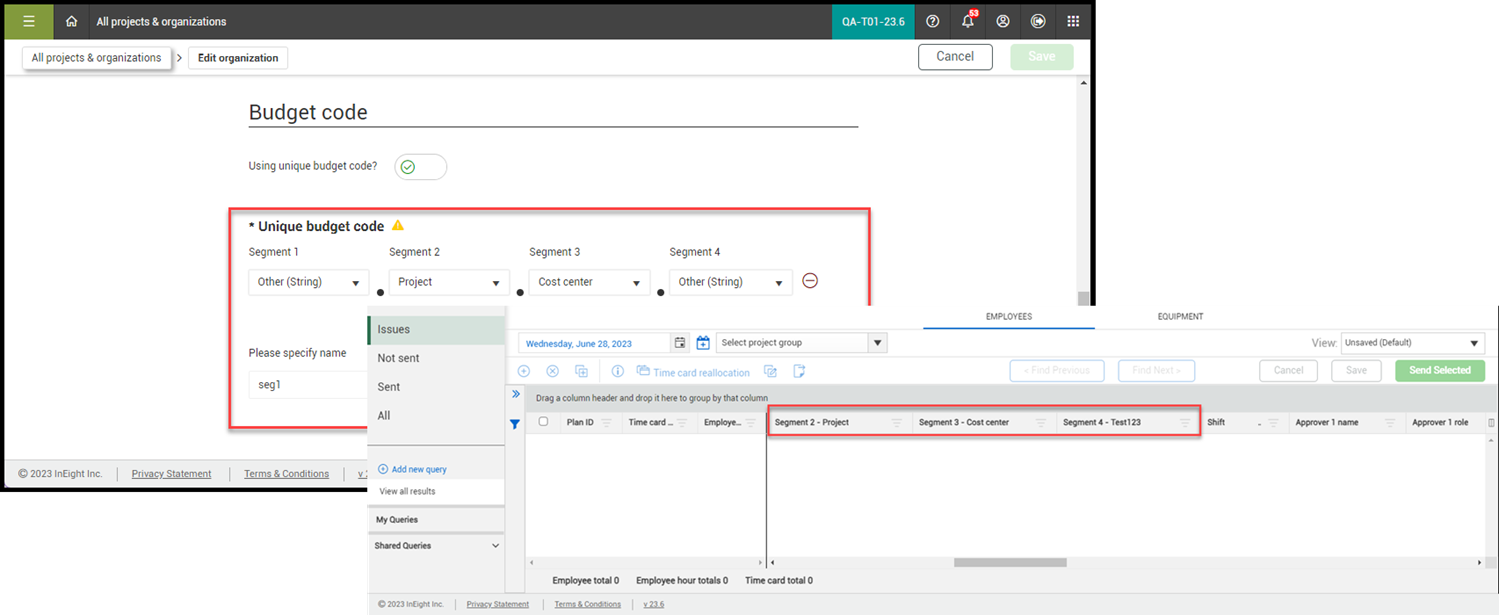
Unique budget code segments
You can populate budget segments to show a unique code label. Unique budget code segments contain additional options to identify a cost item using four independent fields that are separated by periods. When you configure unique budget codes at the organization level (All projects & organizations > Edit organization) the segment numbers are matched with the corresponding columns in Time Center.
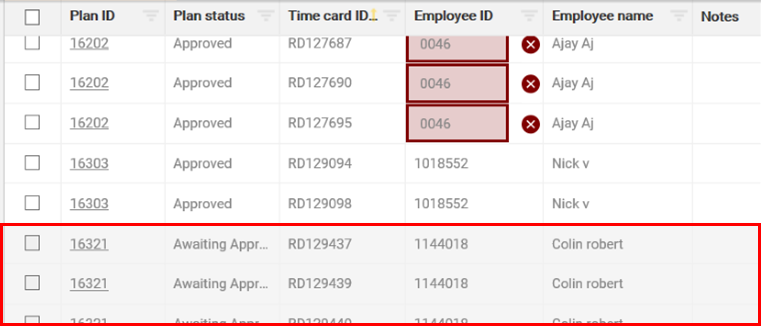
Unapproved Time Cards
Note that time cards that have not yet been approved and are still in Execution or Awaiting Approval status are not editable within the Time Center register. You can only edit approved time cards.
Date Filter
You can filter to a specific date for your time cards by either typing the date in the Date field or by selecting the date from the calendar icon.
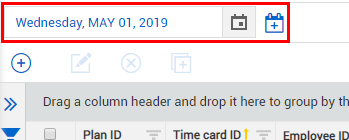
To select a date range, click the add date icon and select an end date.


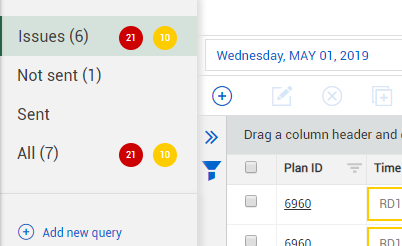
Time Card Pre-Set Filters
The upper portion of the left side panel contains pre-set filters to help you focus on the time cards that need review. You have four pre-set filter options you can select from:
-
Issues – Time cards that have information on them tagged as issues
-
In Progress – Time cards that are in a processing status before sending to Payroll.
-
Not sent – Filters to time cards that have an Integration status of Not sent.
-
Sent – Filters to time cards that have an Integration status of Sent, or time cards that have been sent to Payroll
-
All – Shows all time cards within the selected date(s)
Query Builder
In addition to the filters you can set on individual columns, you can also add filters using the Query Builder. The following steps walk you through creating a query using the Query Builder.
Step by Step — Create a Query
-
From the Time Center register, do one of the following to open the Query Builder:
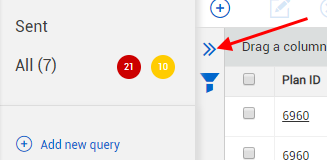
-
Click on the double arrows next to the left side bar.

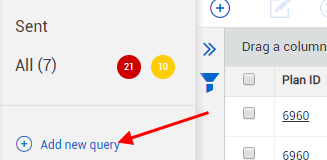
-
Click the Add new query link on the left side bar.
-
-
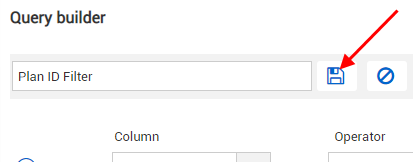
Type the name of the query in the New query name field.
-
Select Plan ID from the Column drop-down list.
-
Select Equal from the Operator drop-down list.
-
Type a Plan ID value into the Value field.
-
Click Apply.
-
The query applies to the timecards on the left
-
-
Click on the Save query icon to save the query.
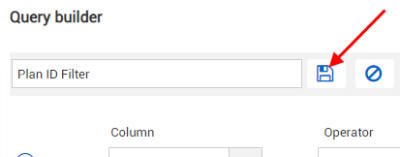
-
Your query will now show up under My queries. No one will be able to see this query unless you share it
-
The Share query icon appears. You can share your saved queries with others, so they can use the queries as well
-
-
Select the Share query icon.

-
The query will now show up under Shared queries
When you share your query, you cannot edit it until you unshare it.
When you are granted level 2 or 3 permission and the Removed shared queries permission is enabled, you can unshare a shared query, removing from the shared list for all users.
-


Filter Indicators
The number next to the top filter indicator shows how many queries have been applied.

An additional filter indicator displays in yellow for each filter applied.
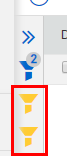
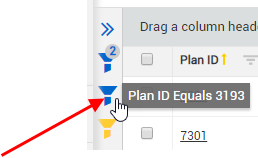
You can hover over the indicator of each applied filter to see the filter name, and you can click on each indicator to remove them from being applied.
Error Indicators
Errors
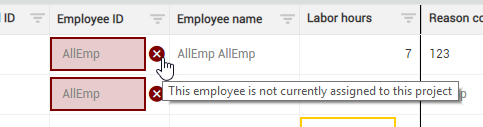
Fields that appear in red indicate an error with information on the time card. Time cards with red error indicators cannot be sent to Payroll. Hovering over the X will give you the reason for the error, so you can correct information as needed.
Warnings
Fields in yellow indicate warnings. Time cards with warnings can still be sent to Payroll, but it is recommended to fix warnings to avoid possible confusion or issues with time cards. You can hover over the warning indicator symbol to see the reason for the warning, so you can make corrections.

Edit notes
You can edit notes originating in the Weekly Time Sheet or Global Time Center.
In the Time card register, under the Notes column, click the Edit note icon. .
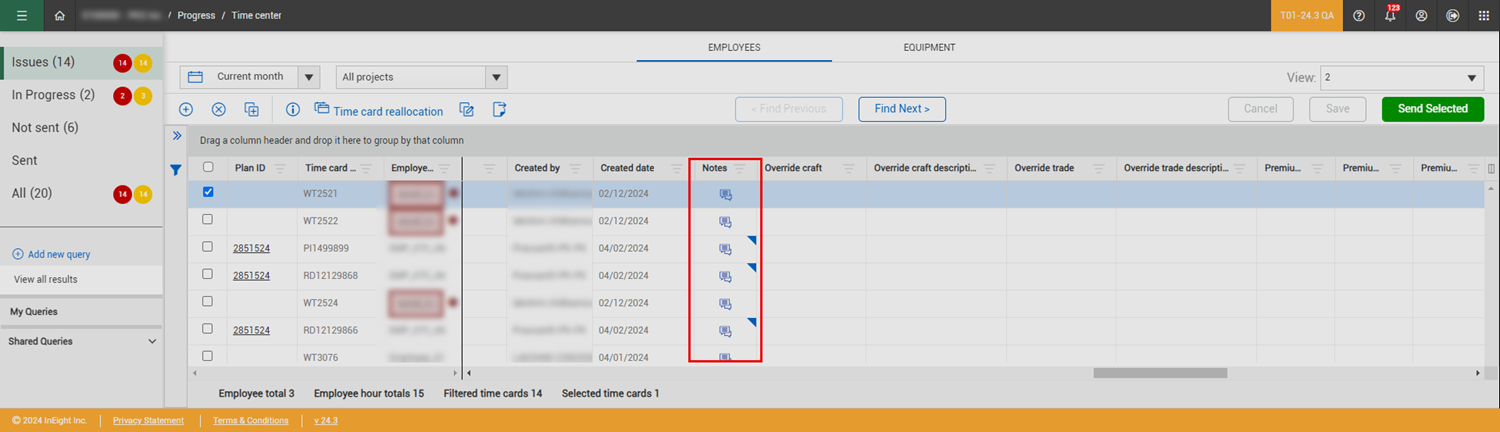
The Notes dialog box will open where you can add or edit details.
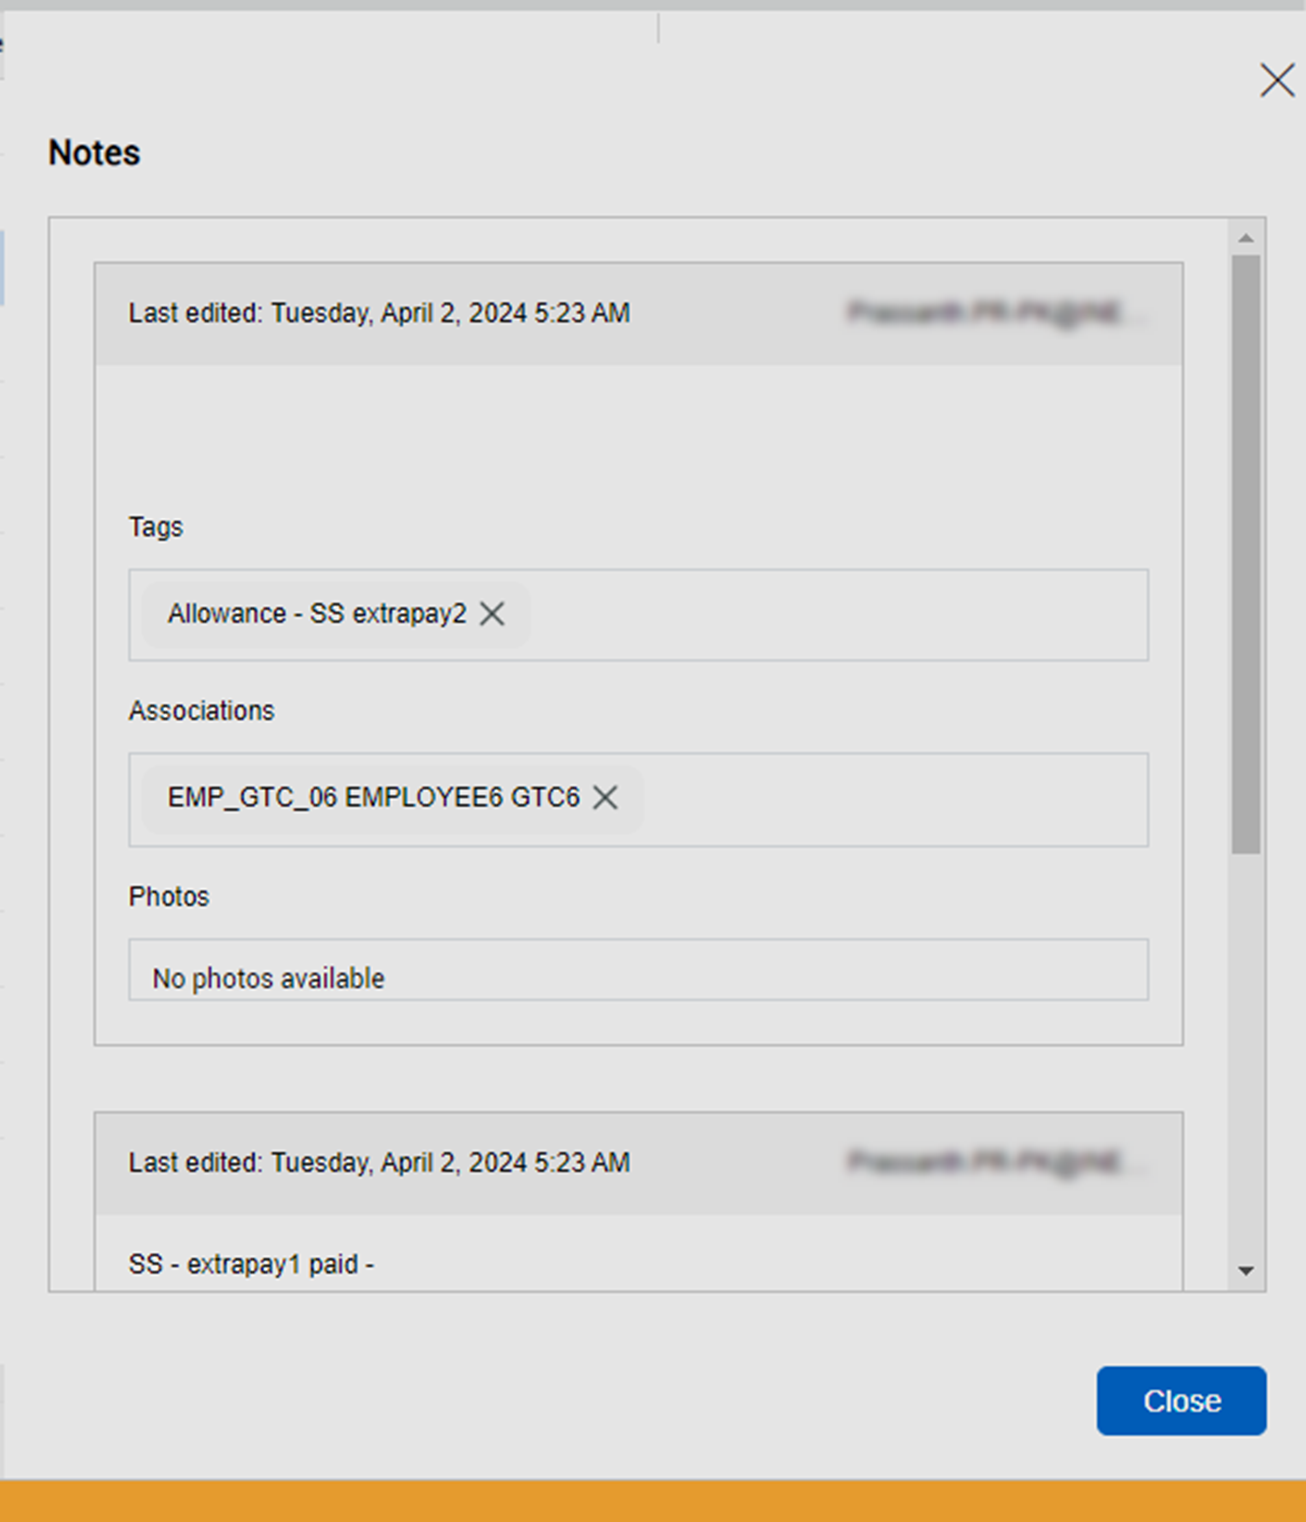
In the Photos section, you can click the photo to preview, and a larger version of the photo shows. You can right-click on the photo to download or delete it.